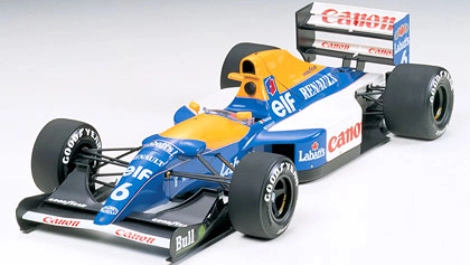
Beginner's guide to enjoying plastic model building
Introducing items that are useful for assembly and painting
Tamiya's scale models (plastic models) are full of the fun of making hobbies. Reliable tools and paints are what bring out the best in them. This page introduces the steps required for model making and Tamiya's craft tools and makeup materials suitable for each step, for those who are making plastic models for the first time or are looking for the necessary tools.
- Index
- 1. Basic items you should have first
- 2. Protect your desk with a cutting mat
- 3. Cut out the parts (with nippers)
- 4. Parts processing (cutter knife)
- 5. Cutting out with scissors
- 6. Bonding of parts
- 7. Handling small parts (tweezers)
- 8. Drilling (pin vice/drill)
- 9. Sanding
- 10. Putty processing
- 11. Preparing the base for painting (surfacer)
- 12. Masking the areas to be painted
- 13. Types of Tamiya Colors
- 15. Airbrush painting
- Video Introduction to Compressor Advanced
- Video Introducing the Power Compressor
- 16. Adding depth with inking paint
- 18. Applying decals
- 19. Beautiful glossy finish
- 20. Display your work
Index
- Basic items
- Cutting mat
- Cut out the parts
- Parts processing
- Cutting out with scissors
- Bonding of parts
- Handling small parts
- Drilling
- Sanding
- Putty processing
- Preparing the base for painting
- Masking
- Types of Tamiya Colors
- Brush painting
- Airbrush painting
- Ink painting
- Weathering
- Applying decals
- Glossy finish
- Display your work
1. Basic items you should have first
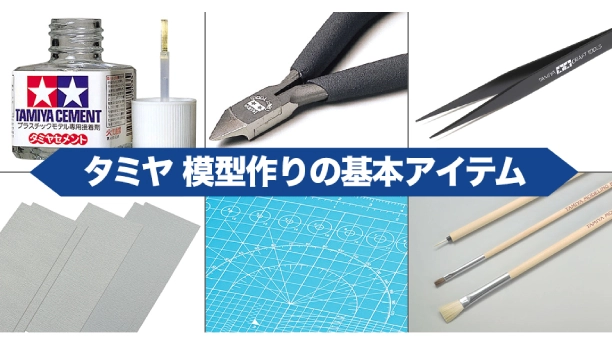
These are the basic items required for general model making. If you are making a plastic model for the first time and are unsure of what to choose at first, why not start with the basic items introduced here? Once you get used to it, you can add the tools you need according to your purpose and preferences, and the fun of model making will increase.
2. Protect your desk with a cutting mat
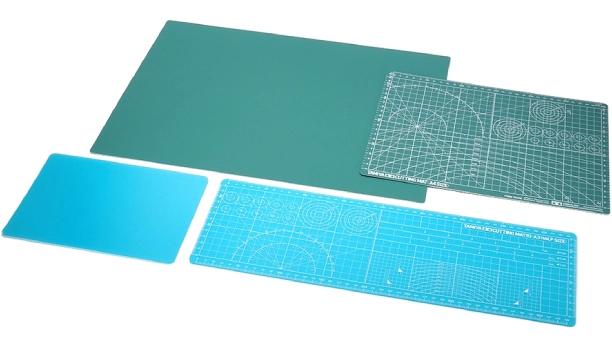
A cutting mat is something you'll want to have ready when making a model. We have a variety of flexible mats in sizes such as A3, A4, and A5, which will prevent your desk from getting scratched when cutting out parts, plastic boards, and decals. The front side is printed with guides for grids, angles, R curves, and circles, which are useful for cutting masking tape. The back side is a plain, reversible type.
3. Cut out the parts (with nippers)
Making a plastic model starts with cutting the parts out of a frame called a "runner." To cut out the parts, a special tool called a "nipper" is used. Tamiya offers a variety of types of nippers, including a "thin-bladed nipper" that is suitable for cutting delicate parts of plastic models, as well as a "modeler's nipper" that can be used for a wide range of things, including mini 4WDs, the construction series, and plastic materials, so it is recommended to use the right type depending on the purpose.

4. Parts processing (cutter knife)
Cutters and knives are used to make fine corrections to the edges of cut parts and to cut decals and masking tape. These blades are also available in types with sharp edges for model making, making them suitable for detailed work. If you feel that the blade has become dull, replace it as soon as possible to keep it sharp, which is the key to enjoying model making safely and comfortably.

5. Cutting out with scissors
From cutting decals (slide marks), masking tape, and etching parts to cutting plastic boards and soft metals, scissors are an essential tool for model making. Tamiya's craft tools offer a variety of scissors developed for various model making tasks. Work accurately and smoothly with sharp scissors.

6. Bonding of parts
Adhesive is essential for assembling plastic models. The standard bottled adhesive for plastics, Tamiya Cement, is easy to use, just apply with the brush attached to the cap. By using either the low-viscosity, smooth pour-type or the regular type of Tamiya Cement depending on the size and shape of the parts to be glued, you can easily glue them together.
Other adhesives for plastic models include limonene cement, which is made from citrus fruits and is highly safe; instant adhesives for bonding plastic and metal parts; multi-purpose adhesives (clear) that are also useful for bonding transparent and plated parts; and craft bond, which can be used on paper, wood, and polystyrene foam.
7. Handling small parts (tweezers)
Tweezers are essential for gluing small parts and applying decals. High-quality tweezers that fit comfortably in your hand will sharpen the sense of your fingertips. There are various types available, such as straight, crooked, and reverse action, to suit the area you need to grip and the shape of the part, so use them wisely to make your assembly work more efficient.
8. Drilling (pin vice/drill)
A pin vice is necessary for drilling holes in parts when assembling or detailing plastic models. Hand-operated pin vices make it easy to control the amount of pressure used, making them ideal for processing delicate plastic model parts. The drill bit at the tip is replaceable and comes in drill diameters from 0.2mm to 3mm, so if you have a full set, you can drill holes in a variety of scales and genres.
9. Sanding
Files are used in a variety of situations when assembling plastic models, such as smoothing the edges of cut parts and removing seams between glued parts to create a smooth surface. Tamiya's files for plastic models range from those made specifically for plastic to those that can also be used for metal processing. They also offer "metal files" in sizes suitable for model making, "finishing paper," a water-resistant sandpaper that does not clog easily, and "abrasive sponge sheets" suitable for polishing curved surfaces. These files are available in a range of sizes from coarse 100s to fine 2000 and 3000, and by gradually increasing the grit size, you can obtain a smooth surface.
10. Putty processing
Putty is a convenient item that greatly expands the scope of model making, from fixing gaps and dents in parts to modifications and original modeling. Use different putties according to their characteristics and purpose, such as Tamiya putty (lacquer putty) which is suitable for filling small scratches and gaps, "polyester putty" which is easy to apply thickly and shape, "epoxy putty" which can be freely shaped with your fingers or a spatula like clay, and "light-curing putty" which hardens in about one minute when exposed to light.
11. Preparing the base for painting (surfacer)
Surfacers are used to fix small scratches on the surface of parts and make the base even, improving the adhesion and color development of paint. They are available in colors such as gray, white, and pink to match the color you will be painting on top. In addition to the spray type that can be used to evenly finish large areas, there is also a bottled type that can be applied with a brush and used as a liquid putty. Both types contain primer components, so they are also effective as a base for painting metal parts such as etchings and die-cast parts.
12. Masking the areas to be painted
When painting different colors, the process of covering excess areas to prevent paint from getting on them is called "masking." Masking tape for models is thin and fits well on curved surfaces, does not soak into paint, and leaves no residue on the base after peeling it off. Tape widths range from 1mm to 40mm, and there are also tape types for curved surfaces and large sheet types, so you can use the right tape for the right purpose to comfortably prepare for painting.
13. Types of Tamiya Colors
By painting plastic model parts, you can express the texture of various materials such as metal, rubber, and fabric. The joy of model making is whether you want to achieve a finish that looks exactly like the real thing or enjoy free coloring. Tamiya Color, a paint for models, comes in more than 400 colors, including spray types that are suitable for painting large areas and bottled types that can be used for a wide range of purposes, from brush painting to airbrush painting. There are two types of spray type paints: Tamiya Color Spray and Air Model Spray. They include metallic colors that are suitable for cars and motorcycles, and colors that realistically reproduce the subtle colors of tanks and airplanes. In addition, the bottled type comes in three series: lacquer paint, which has a strong coating and dries quickly, acrylic paint, which is water-soluble and easy to handle, and enamel paint, which is easy to apply with a brush and is suitable for finishing small details. You can mix your favorite colors and control the gloss state to "glossy, semi-glossy, or matte." *Lacquer paint cannot be applied over acrylic or enamel paint.

Painting with a brush is the easiest way to paint a model. Tamiya Modeling Brushes, developed for painting models, come in a wide variety of types, from flat brushes to faceted brushes, with brush tips made from high-quality natural bristles to special resin bristles. Use different brushes depending on the area and location you want to paint, and enjoy creating painting expressions that take advantage of the size and touch of the brush.
15. Airbrush painting
Airbrush painting uses compressed air pressure to spray paint into a fine mist. It can not only finish large areas evenly, but also allows for a variety of painting expressions, such as fine patterns and gradations, which are difficult to achieve with spray cans or brush painting. Tamiya's airbrush system includes a variety of related items to create a comfortable painting environment, including airbrushes with sizes and nozzle diameters suitable for modeling, air compressors to send out air, and a painting booth, which is essential for indoor spray painting.
- For airbrush painting, Tamiya color lacquer paints, acrylic paints, etc. are diluted with a special solvent and used.
- Lacquer paint cannot be applied over acrylic or enamel paints.

Video Introduction to Compressor Advanced
Video Introducing the Power Compressor
16. Adding depth with inking paint
From the panel lines of airplanes to the fine details of car and motorcycle engines, to the rust color of tank models and the shadows of figures, the technique of pouring low-viscosity paint into the unevenness of the surface of parts to emphasize their three-dimensionality is called "sumi-ire". The specially developed enamel-based "sumi-ire paint" comes in a variety of colors that can be used for models of various genres, such as black, gray, and brown, and is adjusted to the appropriate concentration for pouring. The cap comes with a face brush, making it easy to use right away.
18. Applying decals
Decals (slide marks), such as logos and graphics on racing cars and airplanes, are used to add a finishing touch to plastic models. There is a trick to handling thin decals soaked in water, so please watch the instruction video. Tools that are useful for applying decals include tweezers, cotton swabs to blend the decals into the surface of the part, and Mark Fit to adhere the decal to curved or uneven surfaces. Make good use of these tools and enjoy applying decals.
19. Beautiful glossy finish
A beautiful shine on the body of a car model, on which the surrounding scenery is reflected, is a major factor in enhancing the sense of satisfaction after completion. Precision polishing films and compounds are useful for polishing work such as polishing painted surfaces and removing small scratches on transparent parts. If you want to achieve an even deeper, more moist shine, modeling wax and gloss coating agents are the way to go. Enjoy the exquisite finish.
20. Display your work
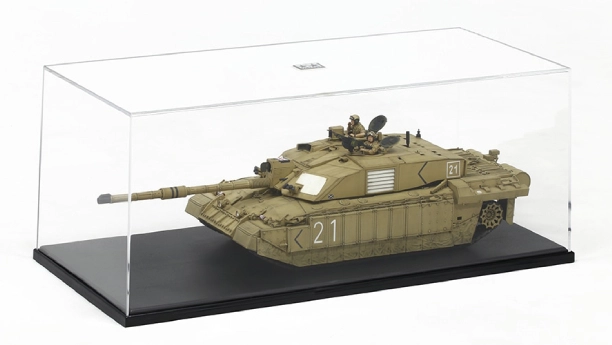
After enjoying assembling and painting your precious creations, you'll want to pay attention to how you display and store them. Our "display cases" come in a variety of sizes and will protect your creations from dust and damage, making them look even better. One way to do this is to arrange the floor of the base or take advantage of the size of the base to create a scene inside the case. Use your ingenuity to display your creations in an attractive way.


